Provisioning unveiled
09/08/2010 § 1 Comment
I remember the first time I got to provision a device to run my application (about a year ago). And it was complicated to get the idea behind all the provisioning process.
This is precisely why I decided to write about it. Maybe you are lucky enough to read this before your journey.
Obviously you can download and read the iOS Developers Program Manual to understand how this process works, but I really think that if you want to get started, this post is very useful.
So let’s get started!
…
All iOS applications must be signed by a valid certificate before they can run on a device. This certificate is a file that identifies you as a developer and it is used by Xcode to sign your app.
Each application has it’s own App ID, that is an unique identifier that enables your app to use Apple Push Notification, In App Purchase, Game Center and Keychain Data sharing with other applications. This identifier consists of an unique 10 character “Bundle Seed ID” prefix generated by Apple and a “Bundle Identifier” suffix that is specified by you (and should match with the Bundle Identifier property from your application’s plist file).
In order to debug your app in the device, you need to create a Provisioning Profile and install it on your device (apart from the Certificate). This provisioning profile is a file that ties a set of developers (certificates) and devices, that are able to develop and run (respectively) a given app.
Meaning that each device has a unique identifier too, that is called UDID and consists of a 40 character string that is similar to a serial number.
So, the basic idea about the provisioning process is to enable a device to run an app that was developed by you, and this is accomplished through the Provisioning Profile and your Certificate.
Now that you know what, let’s see how.
….
First thing is to create an Apple ID if you don’t already have one. After that, you have to join in the iOS Developer Program (unfortunately you have to pay for that, but this is another story).
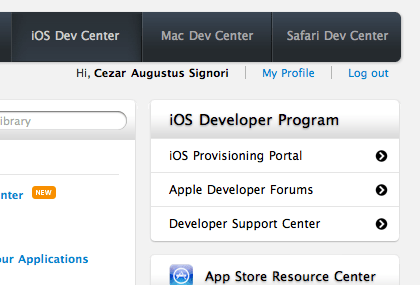
If you already joined the program, go to the iOS Provisioning Portal on the right side of the screen.

Go to the App IDs section, fill the form as requested and tap submit.
Now that you already have your App ID, go to your project in Xcode and open the plist file. You should change your Bundle ID to match the one you used to fill the form.
Ok. Now you have to register your device ID in the provisioning portal, so get it from either iTunes (click here to see how). Or Organizer:
Since you already got your UDID, it is time to register it. Go to the Devices screen and tap on Add Device. Again just fill the form that will appear and confirm.
Time to request your certificate. Open Spotlight and enter Keychain. Create a new certificate request.
 Fill the form just like I did on the following screenshot (with your e-mail and saving to disk).
 Once your are done, go back to the iOS Provisioning Portal and click on Certificates. Then click on “Request a Certificate”, that in your case should be where you can see the “Download” button.
I know, I know… but we are almost in the end of the process. Now it is time to create the Provisioning Profile, so go to the Provisioning screen and tap on “New Profile”.
Just select your certificate, your App ID, your device and submit!
Now, download the provisioning profile you just created and go back to the certificates section, to download your certificate.
Hurting to much? 4 last steps and that is it:
- Double click on your certificate file and it will get installed on your Keychain.
- Double click on the provisioning profile file and it will get installed on your machine.
- Change your application’s target to Device.
- Build and Run!
- Allow Keychain access and install the provisioning profile on the device by confirming both the alert views.
Ok, I said 4 but actually were 5 steps.
Now your app should be successfully installed on your device.
You already know how the provisioning process works and how to do it. So take a time (when you can), to think about it and read the documentation I provided in the beginning of this post.
And let me know if you got any problems 😉


I like this post, enjoyed this one appreciate it for putting up.